Here at The Babbling Brook, we’ve already noticed a few flurries in the air. We think you’ll agree that October has ushered in some unseasonably cold days and nights. So when the weather drives you indoors, and you’re looking for something productive to do, we humbly present the perfect project: digitizing your hard copy photos and slides! Don’t let the word “digitize” scare you—you can digitize a photo or slide with minimal equipment, plus, you have a secret weapon—Christina, Willow Brook’s social media coordinator! Christina has created a step-by-step tutorial (some might say hack) to turn your photos into digital files that you can store electronically, e-mail, and even print. Ready to give it a shot? Read on!
Christina set up this makeshift light board with an iPhone. See how the light shines through the photo, making the photo stand out clearly?
1. Take a photo of a photo
Yes, you read that correctly. Whether you have photo slides or printed photos that you would like to digitize you can do it by taking a photo of a photo. You may be wondering, but how would the image in the photo slide show up? Well, that’s where this simple set of directions comes into play:
For a photo slide:
Lay the photo on a flat surface with light shining through. A photo light board is a great way to do this, but if you don’t have access to one of those, an alternative “hack” we found to do this is by opening a blank white screen on a smart phone or tablet. (The “Notes” app on your device is a good resource as you can open it to a blank note and the whole screen will be illuminated). If you use a phone or tablet make sure the brightness of the device is turned all the way up.
Using a smart phone or a regular camera, take a photo of the illuminated slide. Be sure to hold the camera device directly above the slide and as straight as possible. Zoom in if needed.
Once the photo is on your phone or camera you can crop1 the photo directly on the device or you can cropthe photo once it has been uploaded to a computer. And Voila! You have a digitized image!
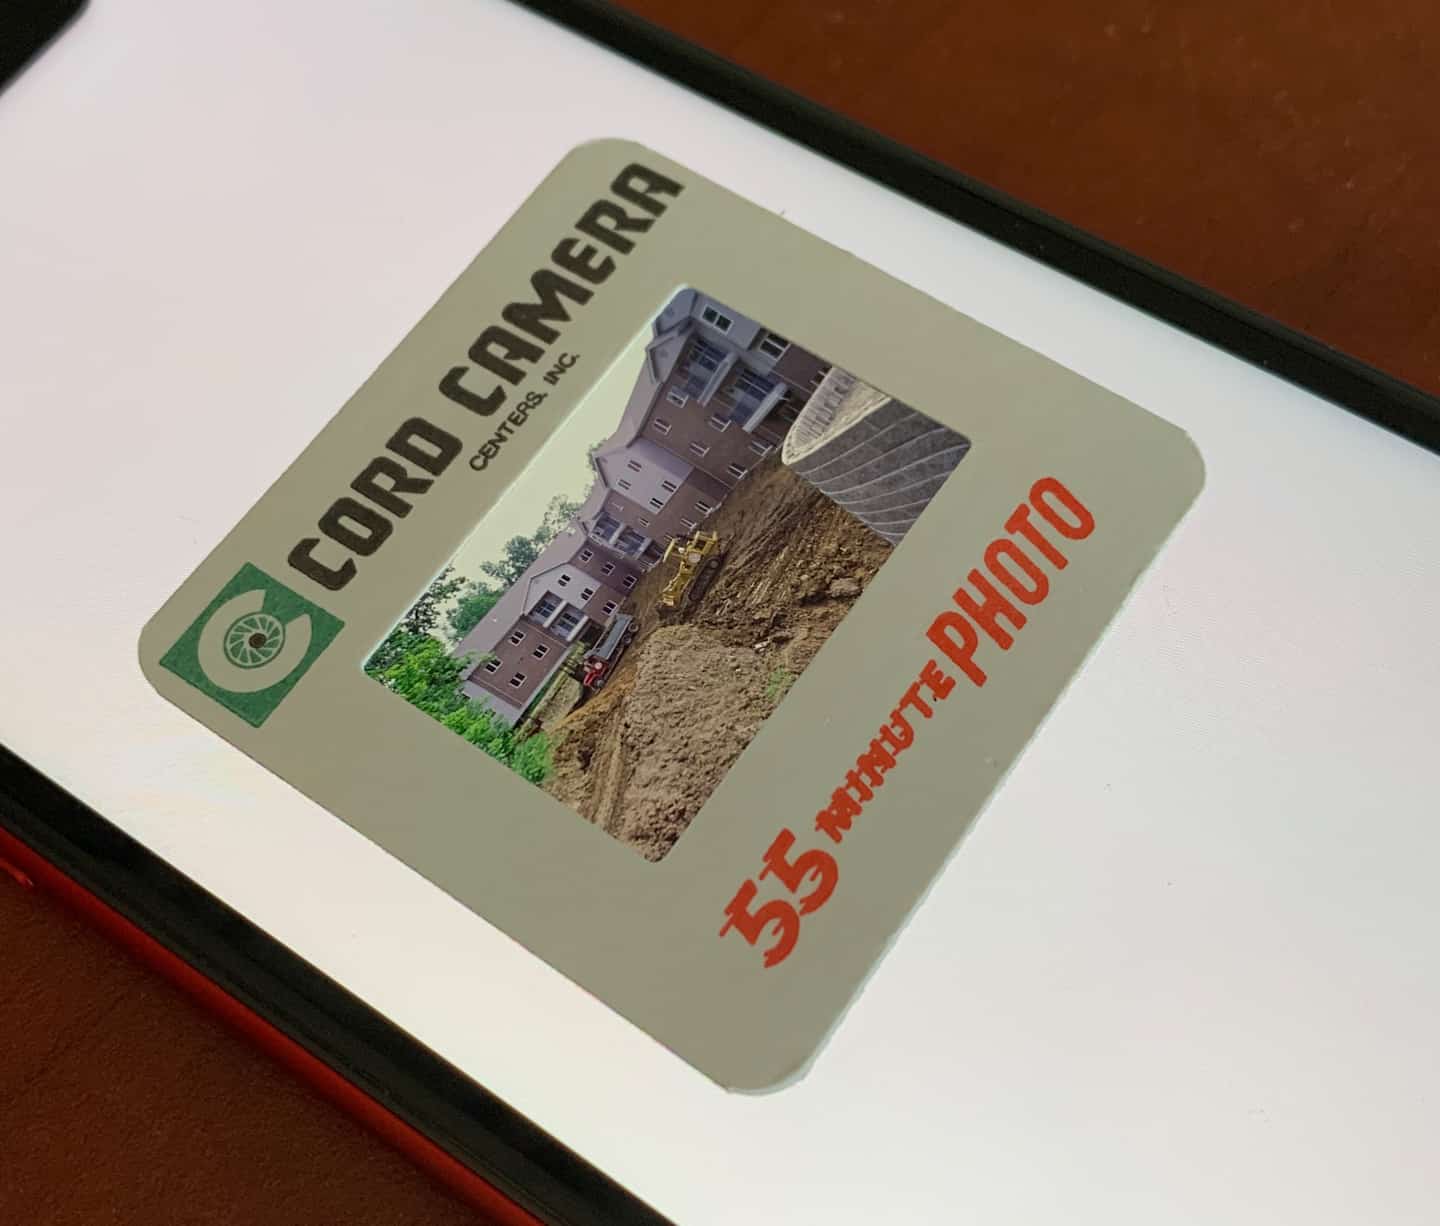
This is the digitized version of the photo taken using the directions above. This is a construction photo, from 1999, of the Willow Brook Christian Village Commons apartments.
For a printed photo:
Lay the photo on a flat surface such as a table or desk with no clutter around the image.
Turn the lights off in the room to avoid an overhead glare, but be sure the room has plenty of natural light (cloudy days are actually great for this because they provide the perfect natural light without the glare or shadows of the sun). Do not try to photograph at night or in a dimly lit room as the image will not turn out clearly.
Hold a phone or camera directly above the photo. Align the photo in the camera frame as straight as possible and snap your photo.
Once you have the photo on your camera or phone you can crop via your device or on your computer to remove any extra edges around the background of the photo.
Hold a phone or camera directly above the photo. Align the photo in the camera frame as straight as possible and snap your photo.
2. Scan your photos
If you have access to a printer with a scanner you can scan your paper photos with a basic scanner. Unfortunately, basic scanners do not work well for photo slides or negatives as those require a source of backlight to reveal the image. Some hesitate to use scanners, as the images may not come out as clear or defined as you might wish.
3. Get your film developed at CVS
Unfortunately, in the digital age that we live in it is increasingly hard to find places that still develop film. Thankfully, we have two options near our Delaware Willow Brook campuses. CVS on W. Central Ave. and CVS on S. Sandusky St. both have photo departments that still develop film! Be prepared that it may take longer than a week to get your photos developed as they send it out of the store to a photo lab.
4. Order a digital photo convertor
It’s rather amazing what technology can do! If you are a bit more tech-savvy and have some money left over in your budget, you could purchase a digital image convertor. This technology scans the photo slide or photo negative by backlighting the image as it is scanning it. Amazon has a few option for this, but we recommend the following brand as it appears to be user-friendly and works well with digitizing slides, in particular: ClearClick Film and Slide Scanner
In the end, it comes down to what resources you have available and what time you have to spend. We hope this was beneficial and not too overwhelming. Remember, take it one step at a time, play around with it, and have fun making memories while saving memories!
1. Unsure how to crop an image? Here are few additional directions for cropping on a smart device. (Hover over the images below to see which directions they correspond with and then click the image to see the full photo.)
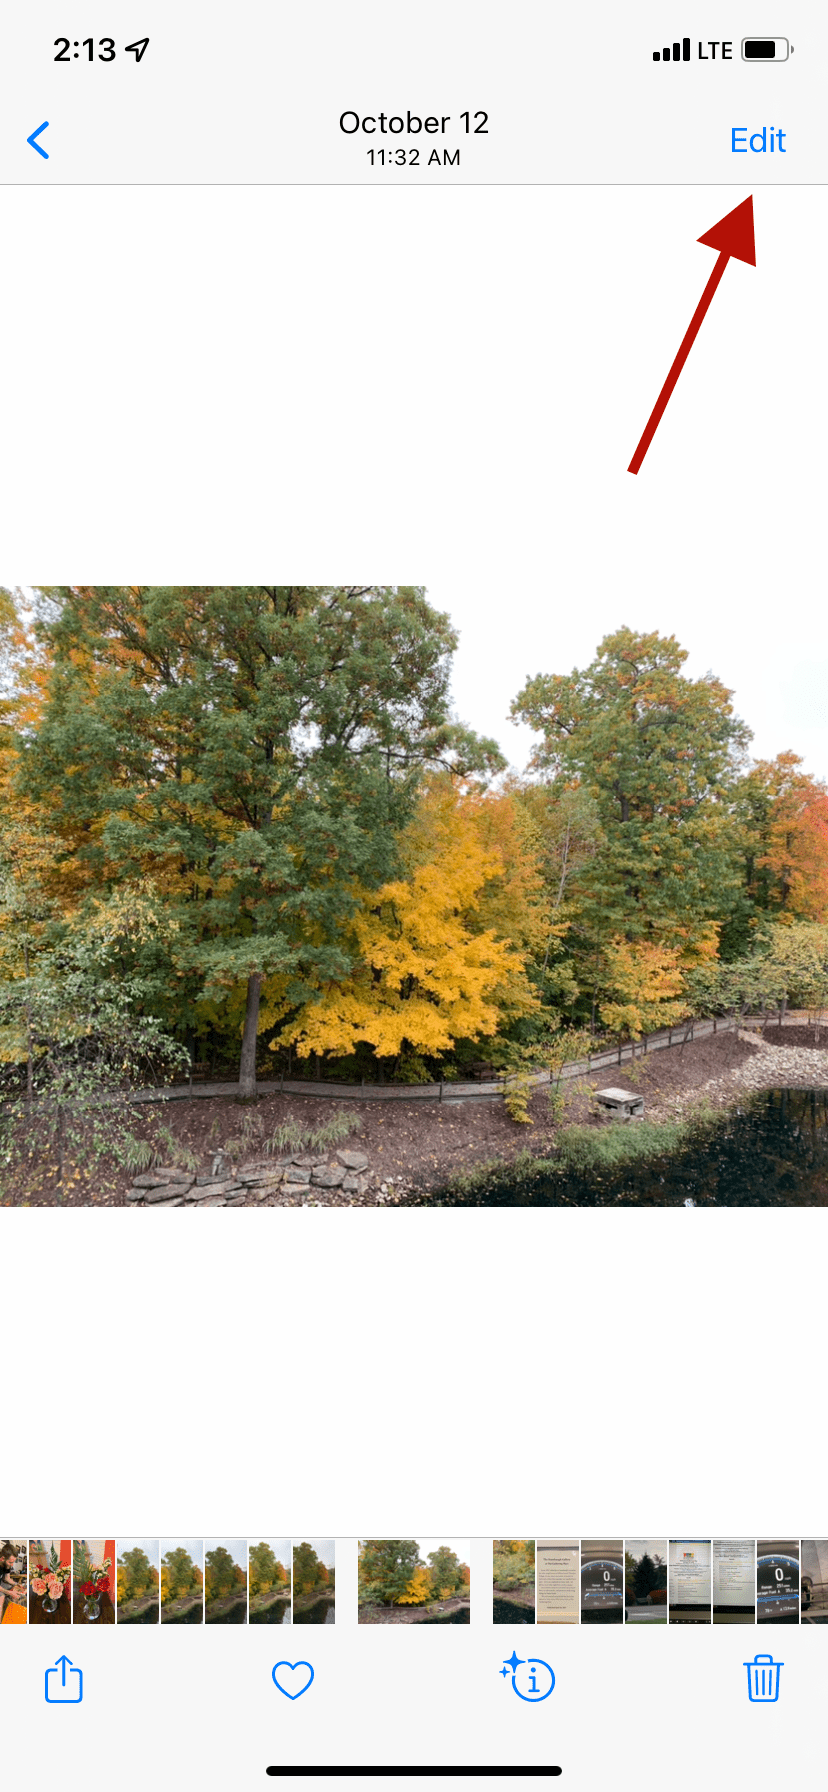
Open the photos app, and click the photo you want to crop.
Select the “Edit” button at the top of the photo.
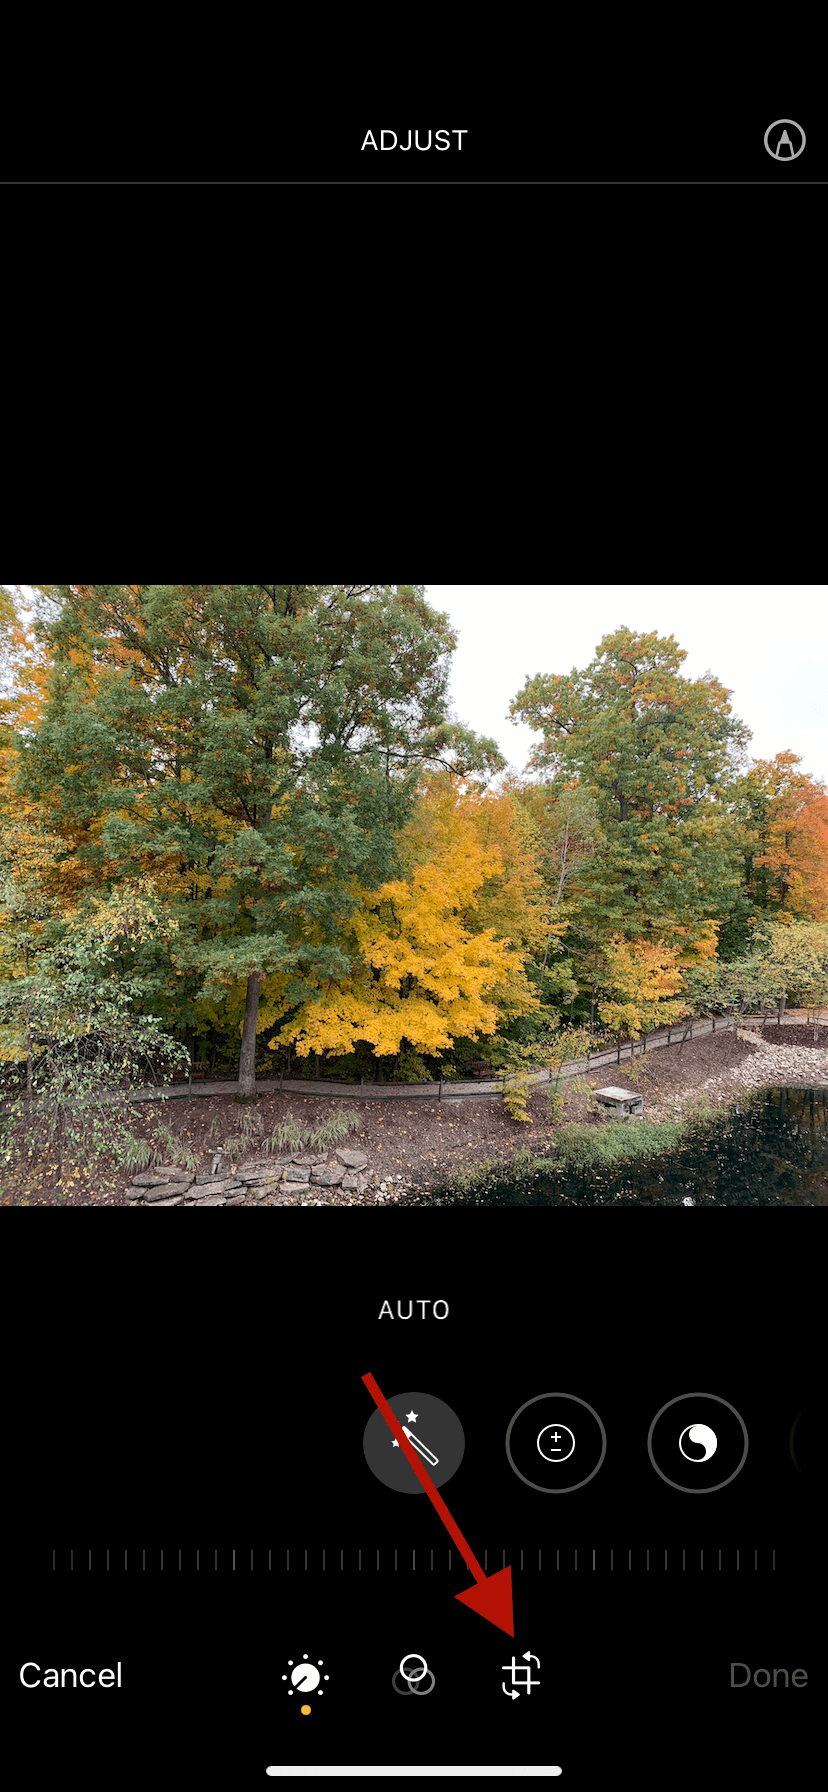
Click the square box at the bottom of the phone.
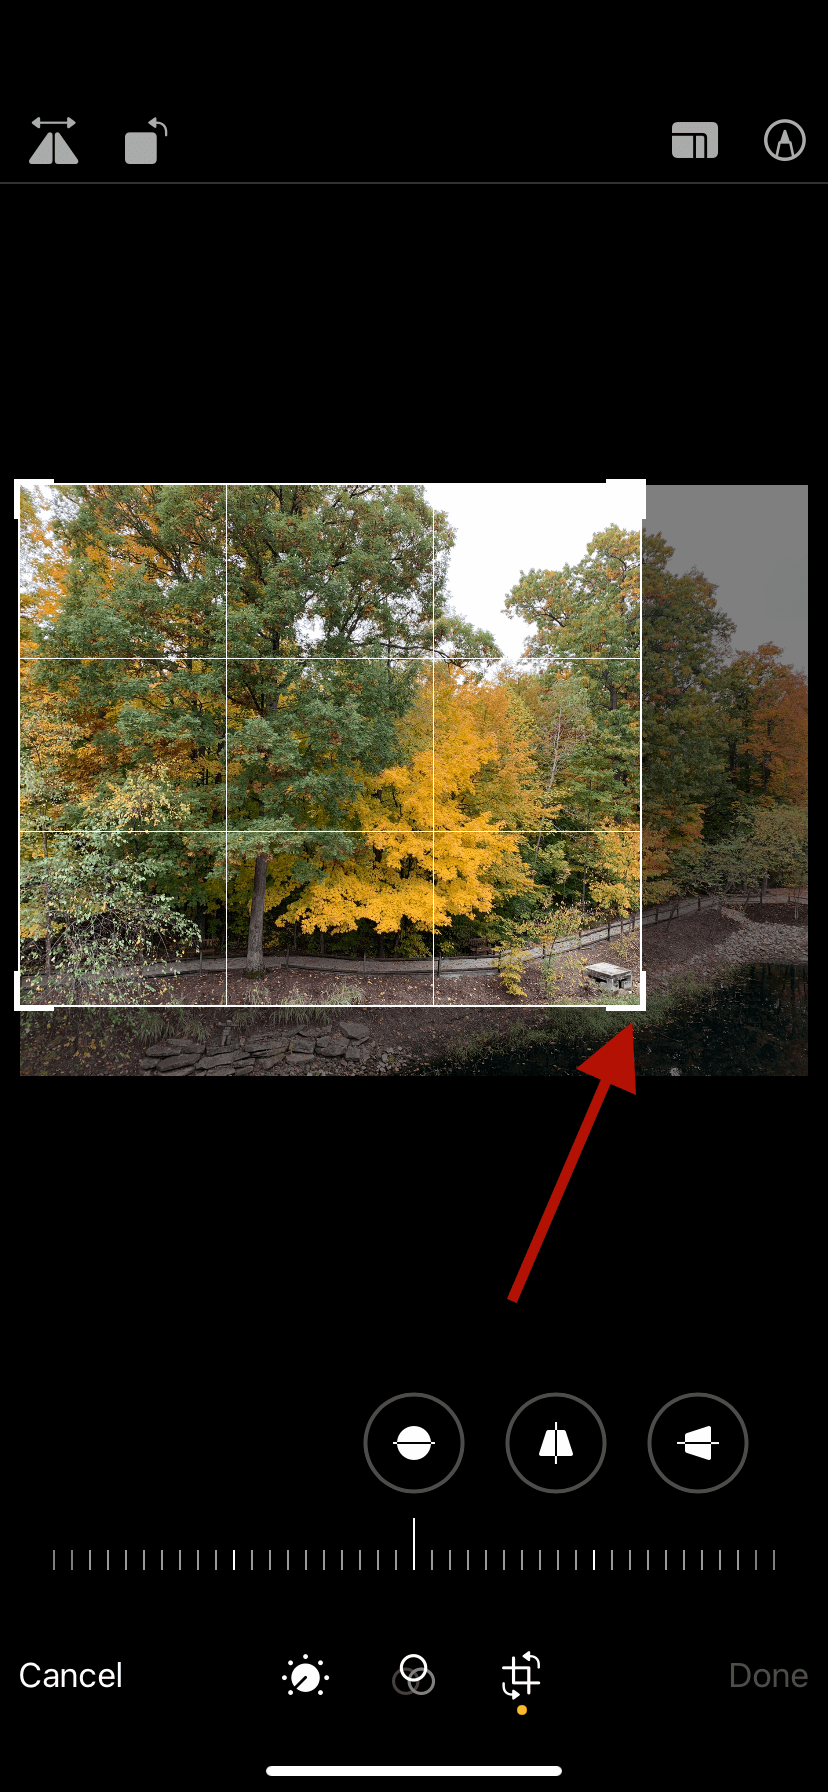
Adjust the box by using your finger to move the corners of the box that appears on the photo.
When you have cropped it to your satisfaction, select “Done.”
Follow the same steps for an Android phone except the icon for cropping will look different *see image below
If you have a basic preview of the photo on your computer there will be a similar crop icon in the top right corner that allows you to crop the image. If you hover your mouse over any of the icons it will indicate what the icon does. Don’t hesitate to reach out to a family member or friend for help!


